SampleBrain
v1.2.2Concatenative synthesis extension for Ableton Live 12 — inspired by SampleBrain (Aphex Twin × Dave Griffiths)
 idriss-sernn
SampleBrain — Ableton Live Extension
Concatenative synthesis inside Ableton Live 12, inspired by SampleBrain by Dave Griffiths & Aphex Twin.
Made by Sernn
What it does
SampleBrain chops your brain tracks (audio corpus) into small grains, analyses each grain spectrally (MFCC or FFT), then reconstructs the target track selection by finding the closest-matching grain for each time slice. The result is placed on a new audio track.
Target (spectral shape) + Brain (sound material) → new audio clip
Install (no dev tools needed)
Requires Ableton Live 12 Beta, Suite edition.
- Download
SampleBrain-1.1.0.ablxfrom Releases - In Live: Preferences → Extensions
- Drag & drop the
.ablxfile onto the panel
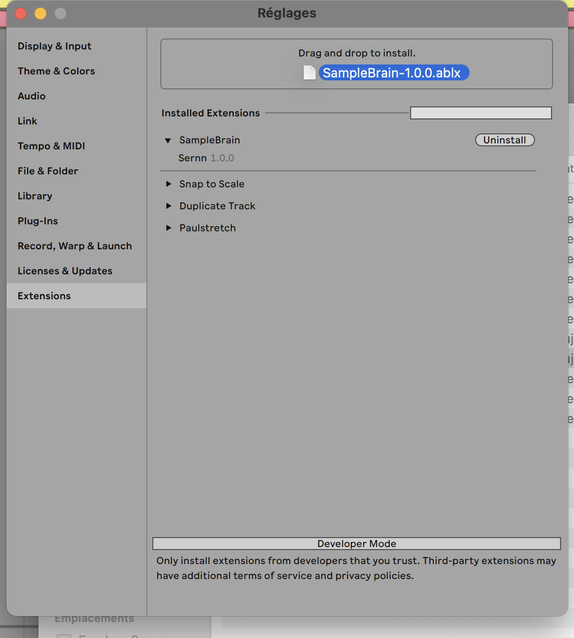
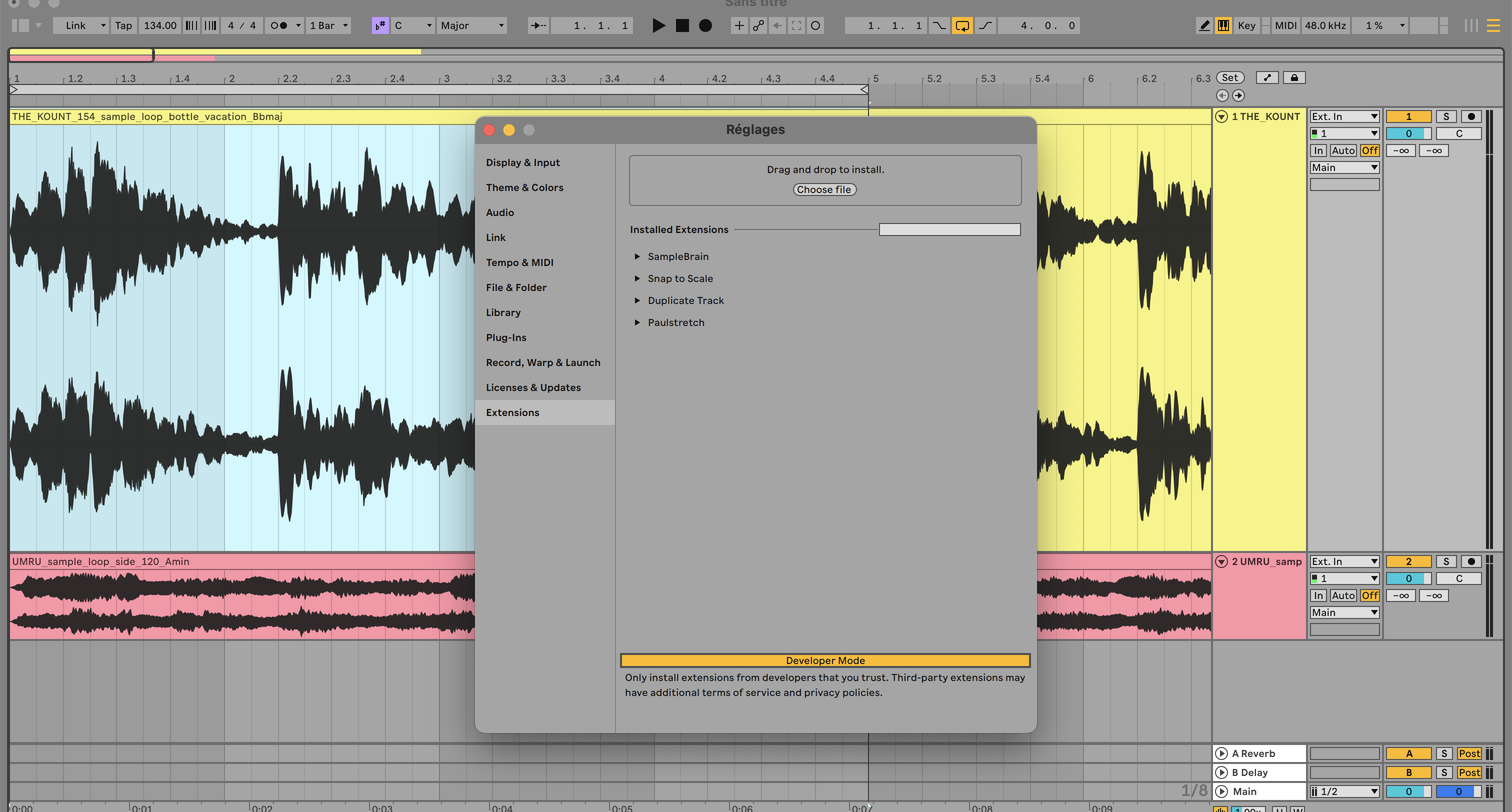
- Make sure Developer Mode is OFF in Live's preferences
- Right-click any audio track arrangement selection → SampleBrain…
Note: if the extension doesn't appear after install, try disabling other extensions temporarily — Live 12 Beta has a known bug where loading many extensions at once can break the catalog.
How to use
Step 1 — Select a time range on an audio track in the Arrangement View (click + drag)
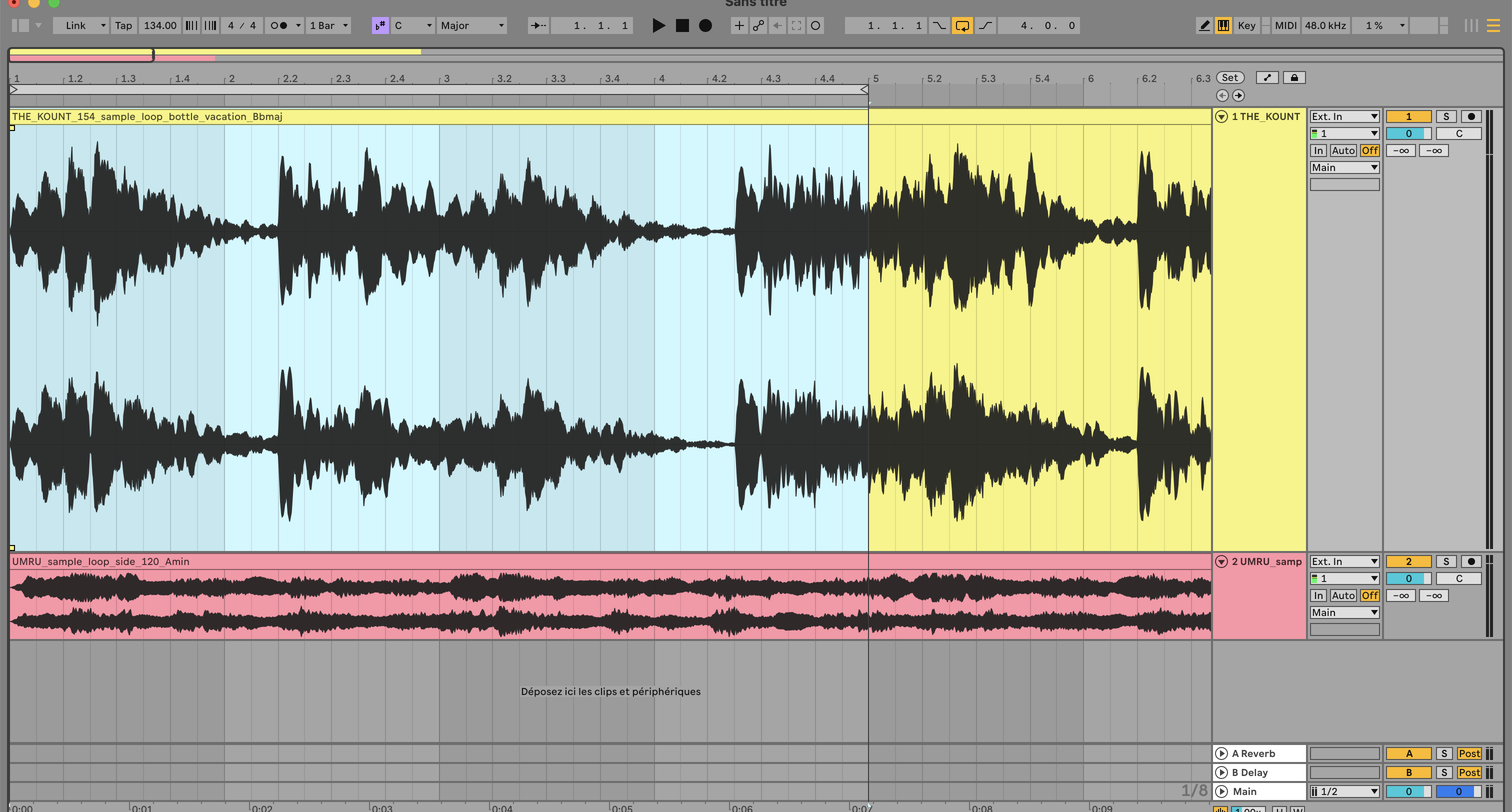
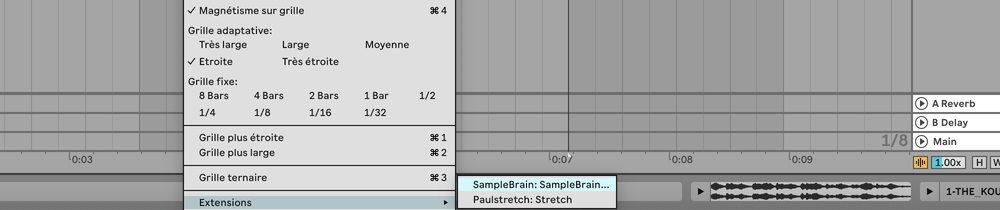
Step 2 — Right-click → Extensions → SampleBrain…
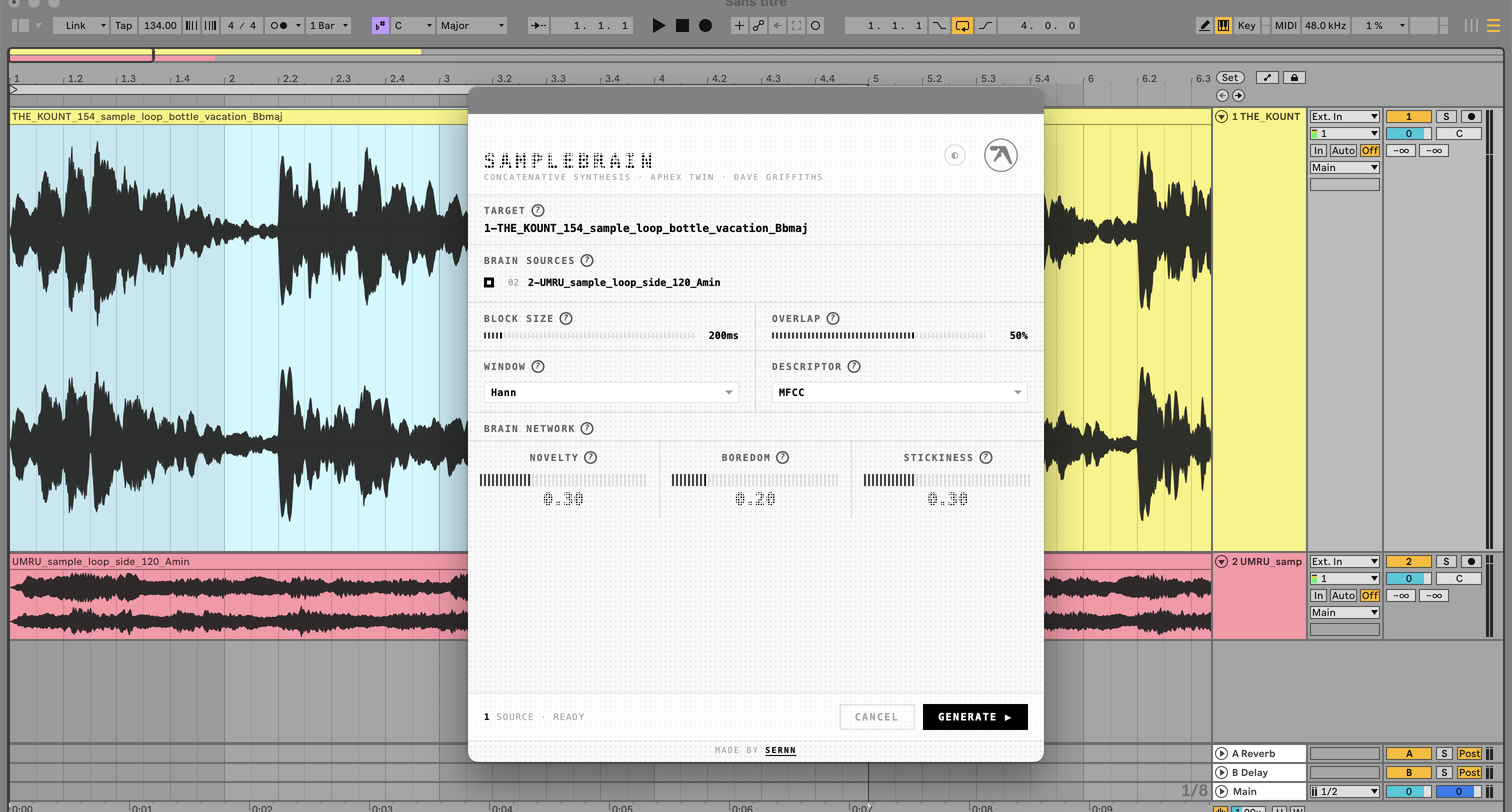
Step 3 — Configure and Generate — check at least one brain source, adjust parameters, click Generate ▶
A new track SB: <target name> appears with the result.
Parameters
| Parameter | Description |
|---|---|
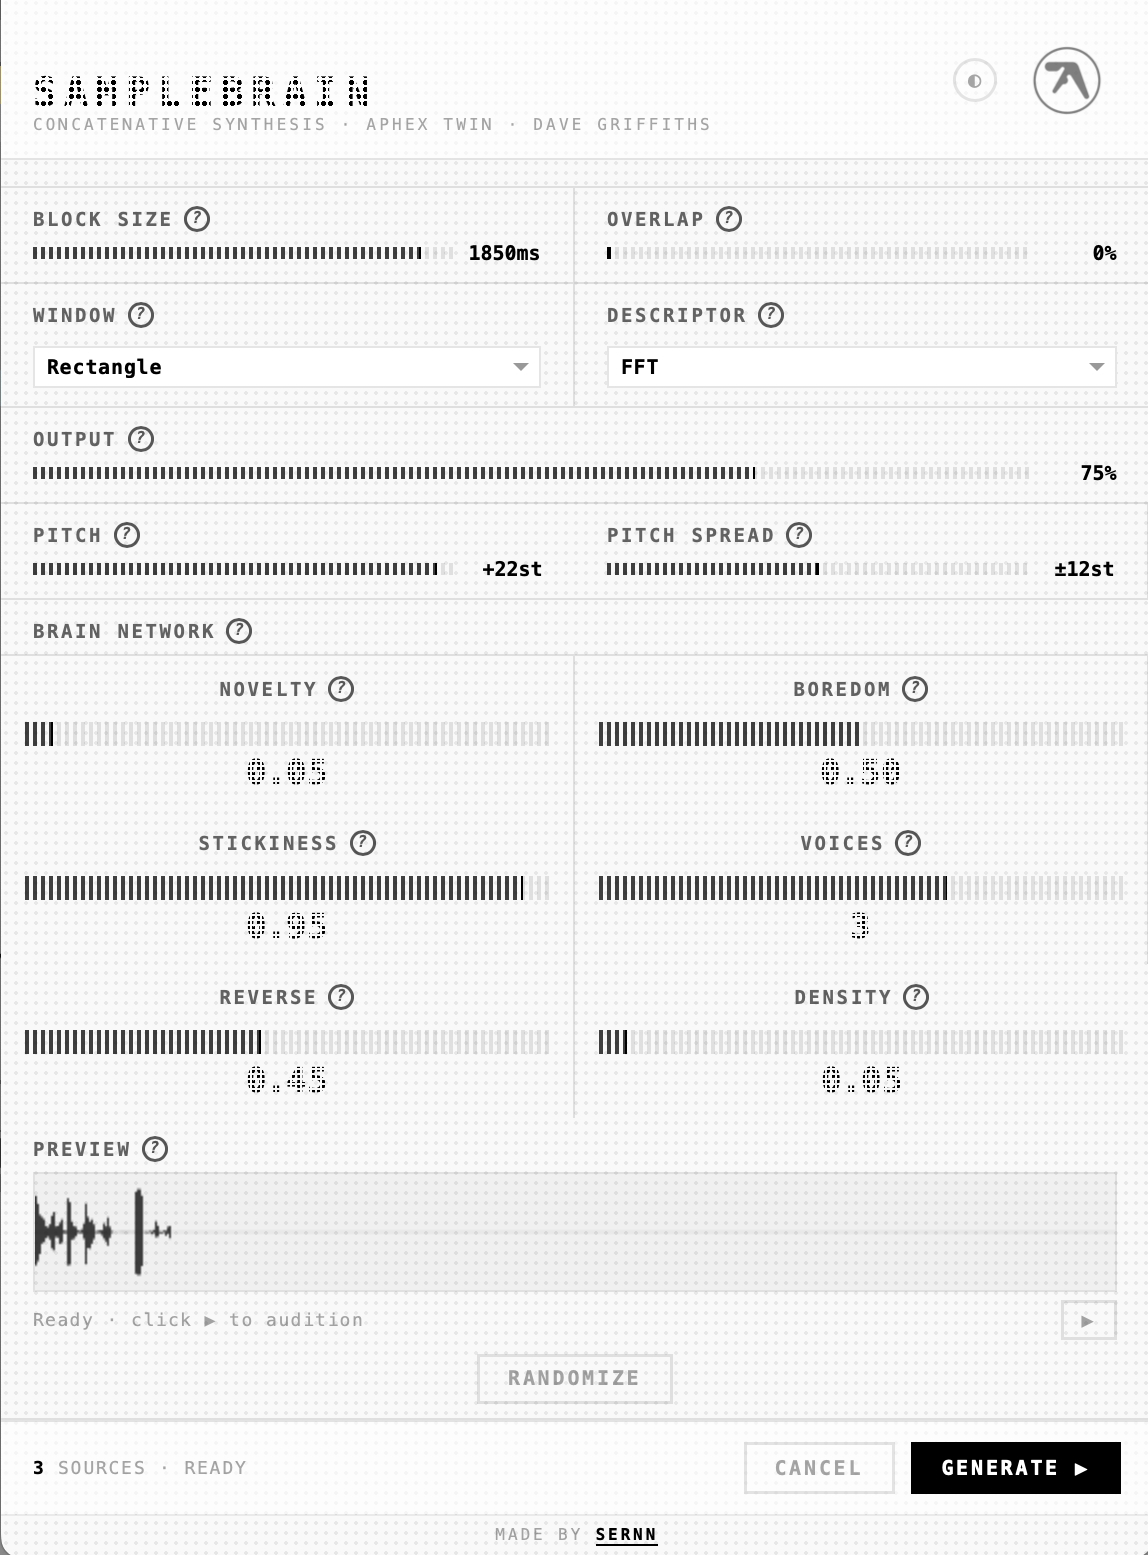
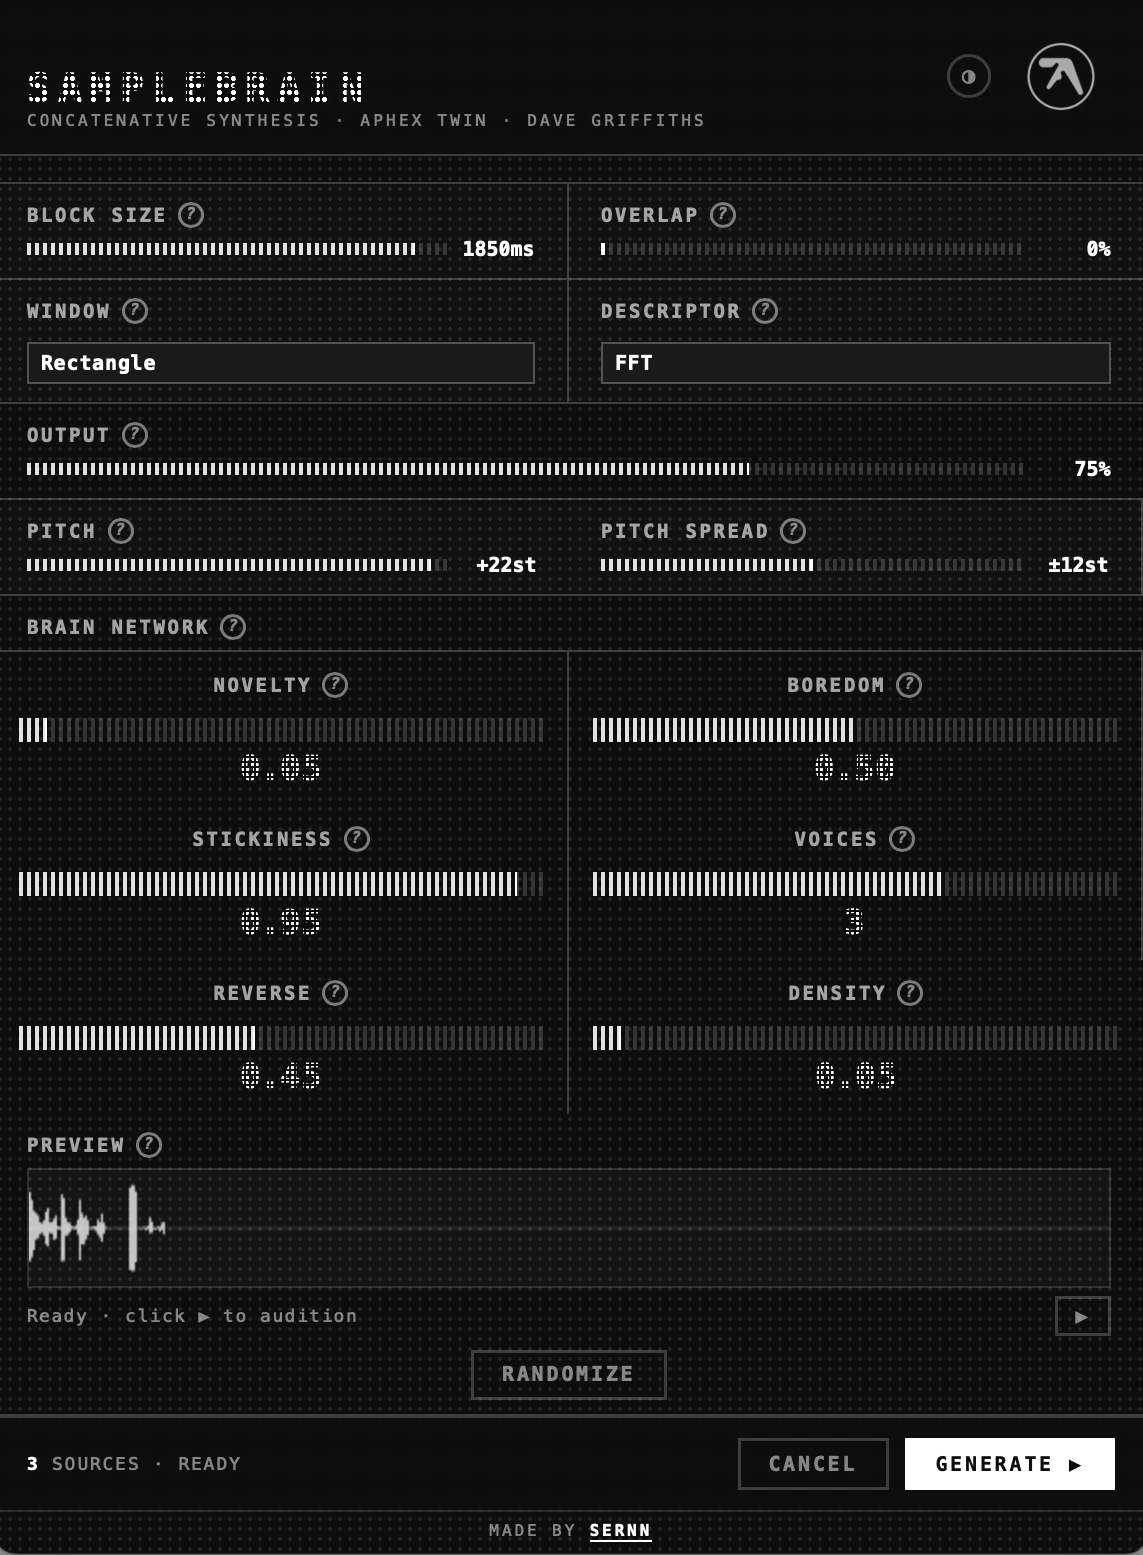
| Block size | Grain size in ms. Small = granular. Large = smooth/tonal. |
| Overlap | OLA crossfade amount. 50% is standard. |
| Window | FFT windowing. Hann recommended. |
| Descriptor | MFCC = timbre match. FFT = spectral match. Mix = both. |
| Novelty | Bias against reusing grains. Higher = more variety. |
| Boredom | How fast novelty penalty resets. |
| Stickiness | Tendency to follow sequential grains. Higher = longer coherent runs. |
Development setup (SDK step by step)
This section explains how to rebuild the extension from source using the Ableton Extensions SDK v1.0.0-beta.0.
Prerequisites
| Tool | Version | Notes |
|---|---|---|
| Ableton Live 12 Beta | Suite | ableton.com |
| Node.js | ≥ 24.14.1 | nodejs.org |
The Extensions SDK .zip | 1.0.0-beta.0 | Distributed by Ableton (Centercode) |
Step 1 — Enable Developer Mode in Live
Open Live 12 Beta → Preferences → Extensions → enable Developer Mode.
Step 2 — Get the SDK
The SDK is distributed by Ableton via Centercode (beta program). The zip contains:
extensions-sdk-1/
├── ableton-extensions-sdk-1.0.0-beta.0.tgz
├── ableton-extensions-cli-1.0.0-beta.0.tgz
├── ableton-create-extension-1.0.0-beta.0.tgz
├── docs/
└── examples/
Copy the two .tgz files into vendor/:
cp path/to/ableton-extensions-sdk-1.0.0-beta.0.tgz vendor/
cp path/to/ableton-extensions-cli-1.0.0-beta.0.tgz vendor/
Step 3 — Install dependencies
npm install
Step 4 — Configure the Extension Host path
Create a .env file at the root of the project:
# macOS
EXTENSION_HOST_PATH=/Applications/Ableton Live 12 Beta.app/Contents/Helpers/ExtensionHost/ExtensionHostNodeModule.node
Note: The
ExtensionHostNodeModule.nodefile is only present in the Beta build of Live, not in the release version yet.

Step 5 — Run in development mode
Important: Live must be open and fully loaded before running npm start.
# 1. Open Ableton Live 12 Beta
# 2. Then:
npm start
You should see:
Starting Extension Host...
  Extension: /path/to/samplebrain
  Live: /Applications/Ableton Live 12 Beta.app/...

info: #######################################
info: Started: Extension Host 1.0.0
info: #######################################
info: Extension Host sends greeting to Live
info: FlipMessageStreamSocket send success
The extension is now live. Right-click on an audio arrangement selection in Live to use it.
Step 6 — Build for production
npm run build
Step 7 — Package as .ablx
npm run package
# → SampleBrain-1.0.0.ablx
Drag the .ablx into Preferences → Extensions (Developer Mode OFF) to install it permanently.
Project structure
samplebrain/
├── src/
│   ├── extension.ts   # Entry point — context menu, HTTP server, main flow
│   ├── brain.ts       # SampleBrain algorithm — segmentation, kNN, OLA synthesis
│   ├── dsp.ts         # FFT (Cooley-Tukey), MFCC, windowing — pure TS, no deps
│   ├── wav.ts         # WAV + AIFF decode/encode — pure TS, no deps
│   ├── dialog.html    # UI — Ryoji Ikeda-inspired dot-matrix aesthetic
│   └── html.d.ts
├── vendor/            # SDK .tgz files (not on npm)
├── build.ts           # esbuild config
├── manifest.json      # Extension metadata
├── package.json
└── tsconfig.json
SDK key concepts
Execution model
Extensions are one-shot: triggered by right-click, run to completion, then stop. No persistent state, no real-time MIDI, no background loops.
export function activate(activation: ActivationContext) {
  const ctx = initialize(activation, "1.0.0");
  ctx.ui.registerContextMenuAction("AudioTrack.ArrangementSelection", "SampleBrain…", "cmd.id");
  ctx.commands.registerCommand("cmd.id", async (arg) => { /* ... */ });
}
Rendering audio
const wavPath = await ctx.resources.renderPreFxAudio(track, startBeat, endBeat);
// Returns a path to a WAV or AIFF file
Showing a dialog
// Serve your HTML over a local HTTP server, then:
const result = await ctx.ui.showModalDialog(`http://127.0.0.1:${port}/`, 576, 648);
// Resolves when the HTML calls close_and_send
Importing & placing a clip
const imported = await ctx.resources.importIntoProject(wavPath);
const newTrack = await song.createAudioTrack();
await newTrack.createAudioClip({ filePath: imported, startTime, duration, isWarped: false });
Progress dialog
await ctx.ui.withinProgressDialog("Processing…", {}, async (update, signal) => {
  update("Step 1…", 20);
  // ...
  update("Done.", 100);
});
License
MIT — do whatever you want with it.
SampleBrain algorithm originally by Dave Griffiths / then-try-this, developed with Aphex Twin.
Rate this extension
One rating per account; you can change it any time.
Comments
No comments yet.