Clip Tool
v1.2.0Free in-app audio clip editor for Ableton Live 12: stereo to mono, DC removal, trimming, fades, pitch and time-stretch, send to Simpler.
 Forty Miles West
Clip Tool
A free audio clip editor that lives inside Ableton Live 12. Right-click a clip to edit the actual audio — trim, clean up, fade, pitch, time-stretch, fold to mono or fire it into a Simpler — and see and hear every change on the waveform before you commit it, without ever leaving Live.
Clip Tool is made by Kerf Audio, the audio tools label of Danny Wincott, and shares the dark, hardware-style look of the rest of the Kerf range.



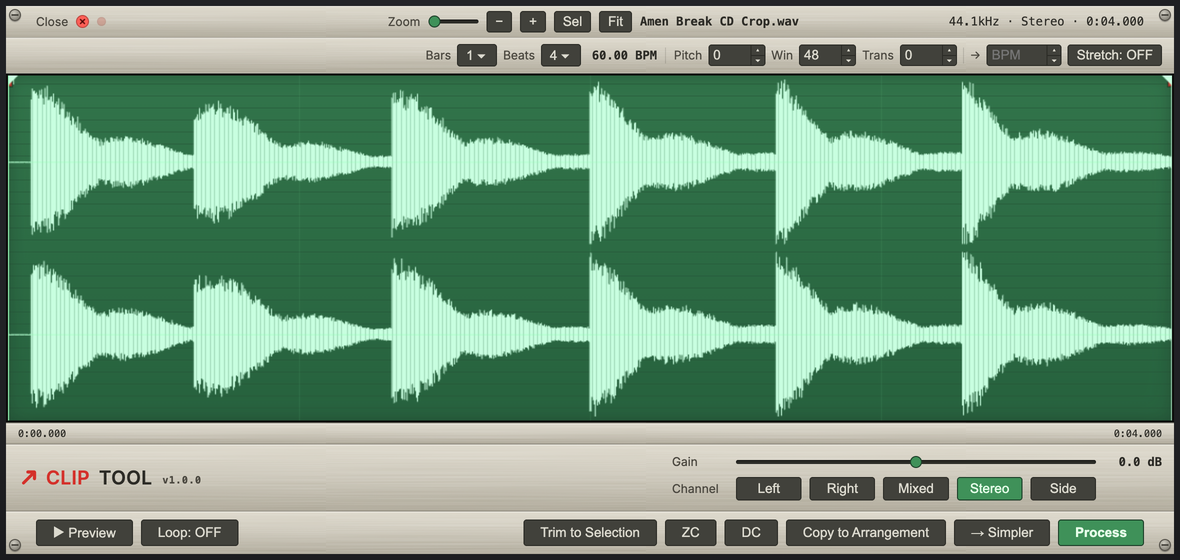
Clip Tool never touches your original sample. Every edit is written to a fresh
file in your project's Samples/Imported/ folder, so you can always get back
to where you started.
What it's for
Live's audio effects are live: they sit on the channel, you can't see them on the clip's waveform, and to make them permanent you have to bounce or render the track out. Clip Tool works the other way round. It edits the actual audio in your clip — trim, clean up, fade, fold to mono, pitch and time-stretch — and bakes the result into a new sample you can see and hear, so you're never guessing what a "live" effect will print.
It also closes a real gap. Sampler prep — removing DC offset, trimming on zero-crossings, fades, a loop-safe time-stretch, and folding stereo down to mono (which Live still has no built-in way to do) — normally means bouncing the track out and hoping for the best. Clip Tool does all of it in place, on the clip, turning a rough chop into something playable without leaving Live.
Features
Editing
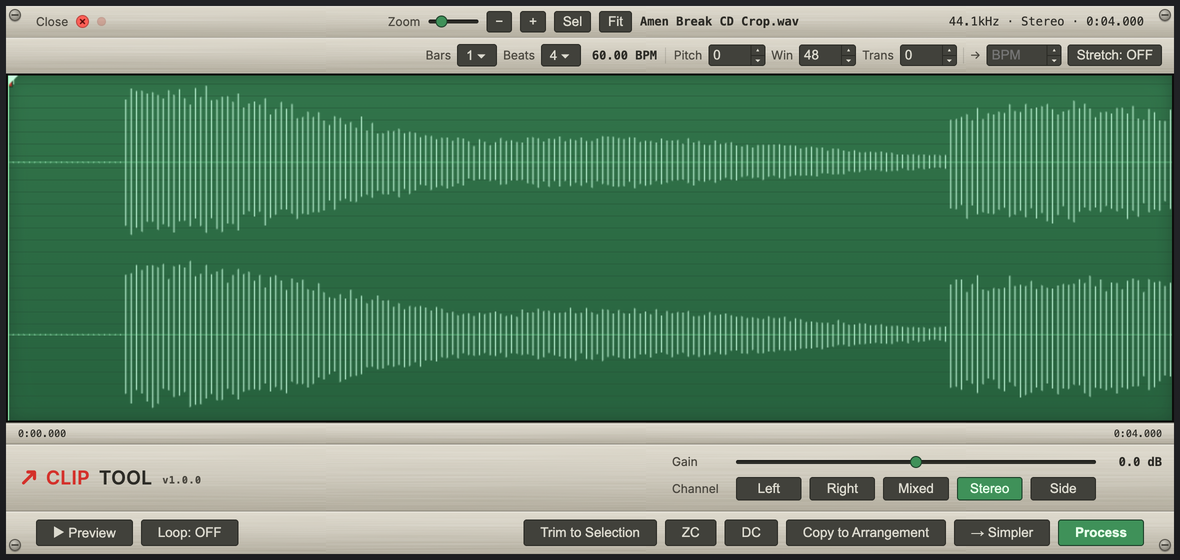
- Sample-accurate zoom — scale the waveform from the whole clip all the way down to individual samples (slider, −/+, Sel to zoom to the selection, Fit), so you can place trims, fades and the playhead on the exact sample for detailed editing.
- Click and drag to select, click to drop the playhead, drag the trim handles.
- Trim to Selection, which is non-destructive and keeps your channel, fade, gain and stretch settings.
- Gain from −18 to +18 dB.
- Channel modes: Stereo, Left, Right, Mixed (mono sum) and Side.
- DC to remove DC offset.
- ZC to snap edit points to zero-crossings so they don't click.
- Fades in and out with Linear, Exponential, Logarithmic or S-curve shapes (right-click), with draggable length and a mid-curve bend handle.
- A Loop region with its own handles and an on/off toggle. While Loop is on,
the loop region is what plays, what the fades sit on and what gets rendered,
as a seamless cycle. Clear (or
Delete) removes the loop, then the selection, to get back to the whole clip. - A pitch-preserving, loop-seamless time-stretch to a target BPM, from a quarter to four times the length (the Stretch button shows MIN or MAX when the target BPM asks for more).
- Pitch shifting in semitones, with grain Window and Transient controls for tuning the character.
A note on the stretch and pitch. These run on my own bespoke algorithm, and it's very much a work in progress. Right now it's a dirty, lo-fi stretch rather than a clean, transparent one. That isn't always a downside: it's great for grit, texture and happy accidents, and it can throw up some genuinely interesting sounds. I'll keep working on it, so expect it to get cleaner over time, and lean into the character in the meantime.
Analysis
- Key and scale detection in the header. A chromagram is built from FFT
frames and correlated against the Krumhansl-Schmuckler major and minor
profiles, so the clip is read as, say,
C majororA minor— handy for matching samples to a track or spotting what you're working with at a glance. - Tempo detection in the header.
- A beat grid driven by the detected tempo, or by the Bars and Beats you set, so edits line up musically.
Output (all of these apply your gain, fade, stretch, channel and DC settings)
Each output renders what Preview plays: the selection (or the loop region while Loop is on). To render the whole clip, right-click and Clear selection first.
- Process replaces the clip in place. A cropped result stays where that audio sat in the arrangement. A stretch that would run into the next clip keeps the original clip's size, with the rest of the audio kept as a tail you can drag out; with free space after it, the whole result is shown.
- Copy to Arrangement drops a new clip just after the original.
- → Simpler builds a new MIDI track with a Simpler loaded and ready to play.
- Rename the rendered sample by right-clicking the filename.
Scope: Clip Tool acts on the one clip you right-clicked, not on every clip that shares the same audio file. If a sample is used by several clips (for example a stereo bounce split across the arrangement), run the tool on each clip you want to change. A batch "apply to all clips using this sample" mode is planned for a future release.
Clip Guard (on by default) scales the result down if it would exceed 0 dBFS. Because Live renders the clip pre-FX, the printed audio can be hotter than the post-FX sound you hear, so an otherwise clean source can clip once imported. Leave it on unless you specifically want to keep levels above full scale for float headroom.

Keyboard and mouse
The preview plays exactly what you'll render, with a moving playhead and live gain.
Keyboard:
| Key | Action |
|---|---|
Space | Play / stop the preview |
← | Jump to the start of the selection |
→ | Jump to the end of the selection |
Delete / Backspace | Clear the loop, or the selection when there is no loop (same as Clear) |
Esc | Close the editor |
Enter | Commit an inline rename (while editing the filename) |
Mouse:
- Right-click inside the selection for the loop menu: Loop selection sets the loop to your current selection (and turns it on), and Clear selection resets the selection to the whole clip.
- Right-click an existing loop region to also get Clear loop, which removes the loop and switches it off.
- Right-click a fade region to choose its curve shape (Linear, Exponential, Logarithmic or S-curve) or clear the fade.
- Right-click the filename to rename your new sample inline — the name you
type is used for the rendered file and the clip Live creates. Press
Enterto commit orEscto cancel.
Install (no dev tools needed)
Requires Ableton Live 12 with Extensions support (currently the Live 12 beta), on macOS or Windows.
- Download
clip-tool.ablxfrom the Releases page. - In Live, open Preferences → Extensions.
- Drag the
clip-tool.ablxfile onto the panel. - Restart Live if it doesn't show up straight away (Live loads extensions at startup).
- Right-click any audio clip and choose Clip Tool.
If nothing happens on install, check that Developer Mode is off in Preferences → Extensions, and if you run a lot of extensions, try turning some off temporarily (the Live 12 beta can choke when loading many at once).
How to use
- Drop an audio clip onto a track, or pick one already in your Set.
- Right-click the clip and choose
Clip Tool. The editor opens on it. - Make your edits (see below).
- Pick an output: Process, Copy to Arrangement or → Simpler.
The original sample is left alone. The result lands in
<your project>/Samples/Imported/.
Working with long stems (what to expect)
- Opening the editor on a long stem takes a moment. Live renders the clip's audio before the editor can show the waveform, so on long files there's a short pause between choosing Clip Tool and the editor appearing. This is normal — it's preparing the waveform, not frozen.
- Pitch and time-stretch on long files take time to process. These are the heaviest operations, and the longer the clip the longer the render. The progress bar climbs steadily through the render, so a moving bar (even a slow one) means it's working, not stuck. Larger pitch shifts take the longest. Changed your mind? Cancel in the progress dialog stops the render and leaves your Set as it was.
- Very long clips open without audio preview. Above 128 MB of rendered audio (roughly 11 to 15 minutes of stereo, depending on Live's recording bit depth) the editor shows the waveform outline and a note saying so. Preview, sample zoom, ZC and Trim to Selection are off, but every edit and all three outputs still work on the full clip.
- If something fails, Clip Tool now says what went wrong in a small dialog instead of closing silently.
The header shows the filename and a readout of the detected key, sample rate, channels and length. Tempo, pitch and time-stretch controls sit just below it, with the detected tempo, Bars and Beats, pitch and grain settings, and the target BPM (here stretching a 120 BPM break to 100):

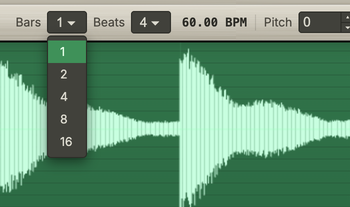
Bars and Beats are app-styled dropdowns, and the number fields have their own up and down steppers:
Folding stereo to mono

With a stereo clip open, use the Channel row:
| Mode | What it does | Reach for it when |
|---|---|---|
| Stereo | Keeps both channels | the stereo image matters and there's no phase trouble |
| Mixed | Mono sum, (L+R)/2 | the channels are in phase, the natural fold-down |
| Left / Right | One channel only | summing cancels (thin snare, missing bass), so audition both and keep the better one |
| Side | The stereo difference, (L−R)/2 | you want only what differs between the channels, like room or cymbals |
Preview each one with Space, keep whichever sounds fullest, then Process or
send it → Simpler. For breakbeats this single step routinely saves a chop
that would otherwise fall apart in mono.
Tips and use cases
- Breakbeats and drum hits: fold to the mono channel that keeps the transient and the low end, snap the edges with ZC, Trim tight, then send it → Simpler.
- Phase-cancelling stereo: if Mixed sounds thin, the channels are out of phase, so switch to Left or Right. Side is handy for pulling out room and width.
- Old or vinyl samples: run DC to recentre a lopsided waveform. You'll get headroom back and stop loops from clicking.
- Seamless loops: set a Loop region, snap with ZC, add short fades, and the cyclic stretch keeps the seam clean at your target BPM.
- Matching a chop to your track: let the beat grid read the tempo, set the target BPM, and stretch. The pitch stays put.
- Tuning a sample: Pitch shifts in semitones without changing the length. Raise Window for a smoother, cleaner sound, drop it for more grain, and use Transient to keep the hits punchy.
- Lean into the lo-fi stretch: the stretch and pitch are deliberately rough for now (see the note above), so push them for character rather than for clean results. Ratios near the 0.25× and 4× limits and small grain windows are a good way to stumble onto unexpected textures.
Build from source
The prebuilt .ablx in the Releases means you don't need any
of this to use Clip Tool. To build it yourself:
npm install
npm run build      # type-check and bundle to dist/
npm run package    # build and produce clip-tool.ablx
npm test           # run the test suite
Building needs the Ableton Extensions SDK 1.0.0-beta.1 (a beta supplied by
Ableton) and Node.js 24.16 or later. The SDK isn't on npm and can't be
redistributed here, so drop your own copy of the two .tgz files into vendor/
(see vendor/README.md) before running npm install.
To run it live against Live's Extension Host, create a .env with the host path:
# macOS
EXTENSION_HOST_PATH=/Applications/Ableton Live 12 Beta.app/Contents/Helpers/ExtensionHost/ExtensionHostNodeModule.node
Layout
src/extension.tsruns in Live's Extension Host: it registers the right-click action, renders the clip to a temporary WAV, shows the editor, and writes the result back.src/dsp.ts(crop, channel, DC, gain, fades, waveform peaks),src/fades.tsandsrc/timestretch.tshold the DSP, compiled once for Node and once as browser globals, so the preview runs the same code as the final render.src/processor.tswraps it with WAV file I/O, progress and cancel.src/editRange.ts(the range each button renders, and the stretch limits) is shared the same way.src/wavDecoder.tsreads Live's render (PCM, float and extensible WAV), andsrc/userMessages.tsholds the error dialog and the long-clip notice.src/webview/is the editor itself (index.html,waveform.js,controls.js), plain HTML, CSS and JavaScript with no framework.
Contributing
Bug reports and ideas are welcome through Issues. Fork it and adapt it for your own work as much as you like. The original repository isn't open for direct changes, but if you'd like something added, open a Pull Request and I'll take a look.
Licence
MIT, so it's free to use, change and share. © 2026 Danny Wincott.
Rate this extension
One rating per account; you can change it any time.
Comments
No comments yet.